Henna Canada
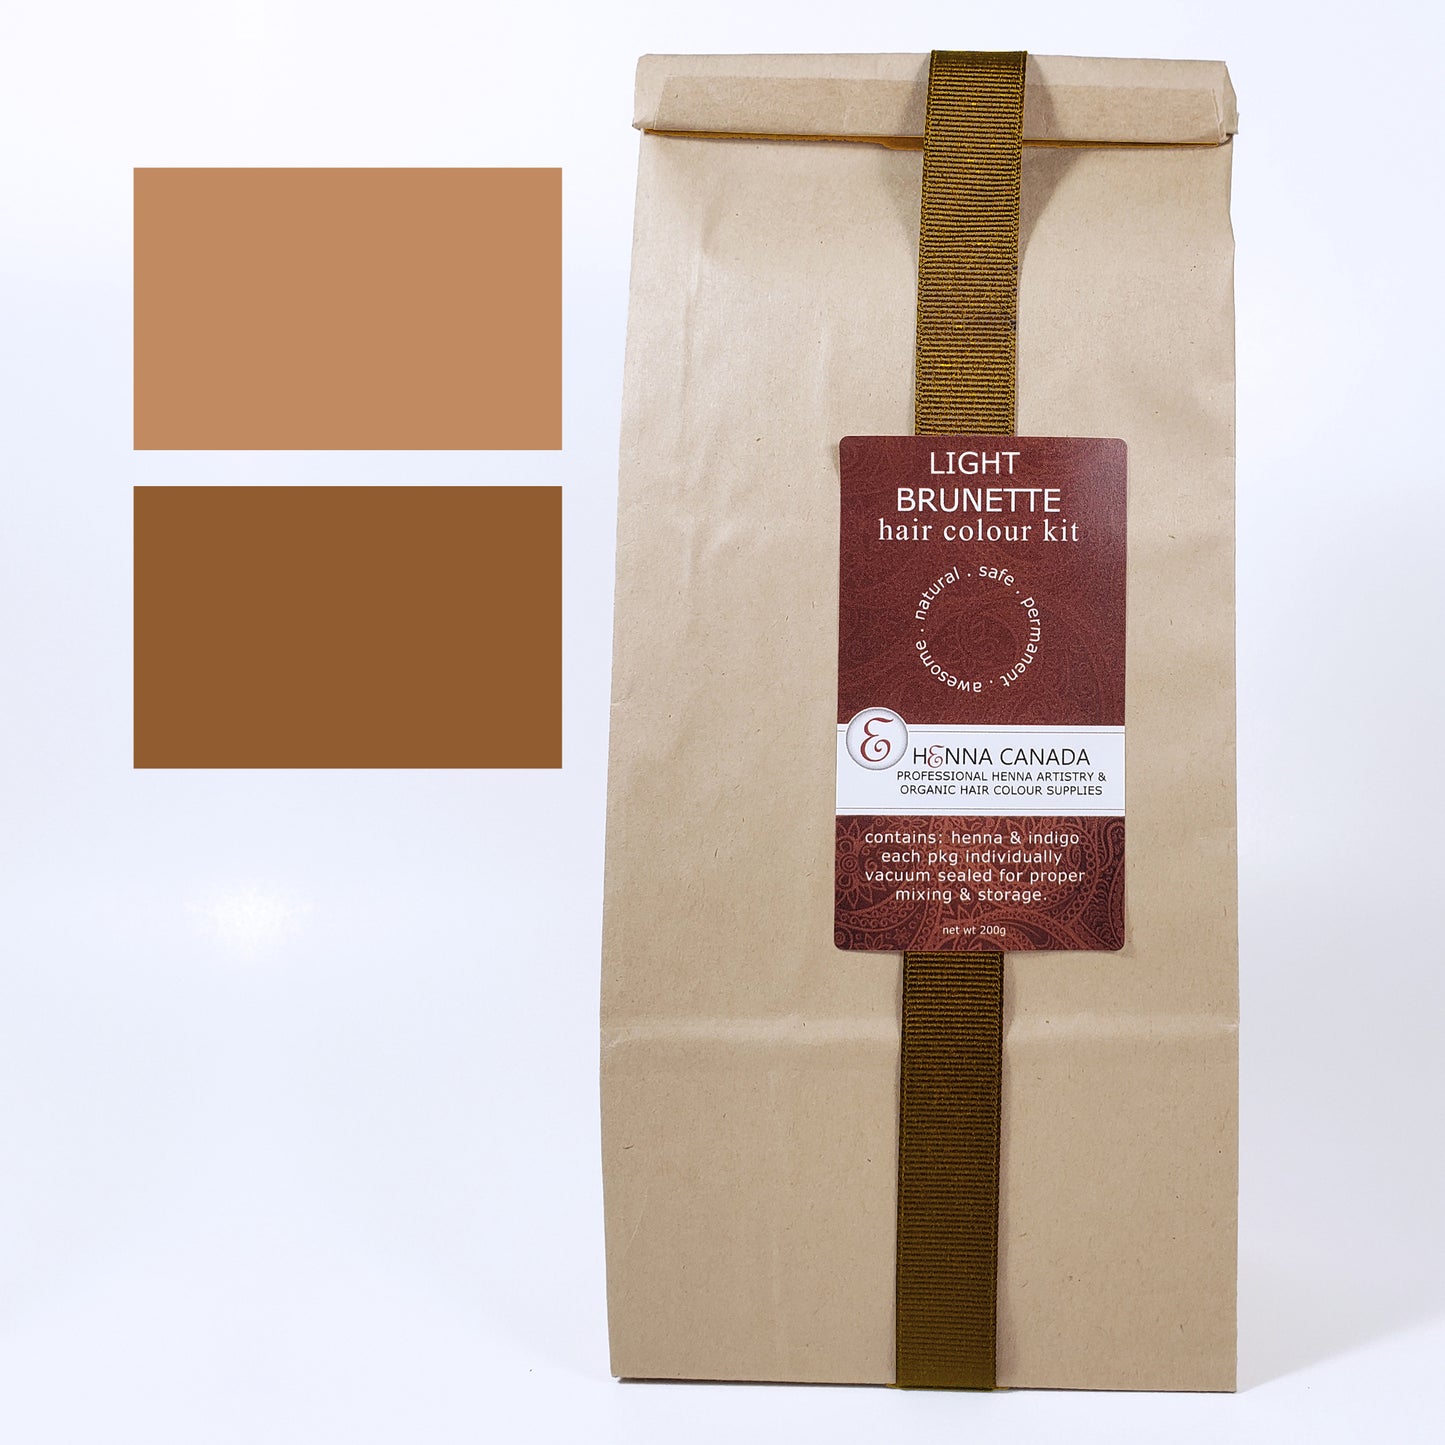
Ligh Bown Hair Kits
Ligh Bown Hair Kits
No se pudo cargar la disponibilidad de retiro
Details
Details
Not sure what to do and a kit sounds like a good idea? I have you covered ;)
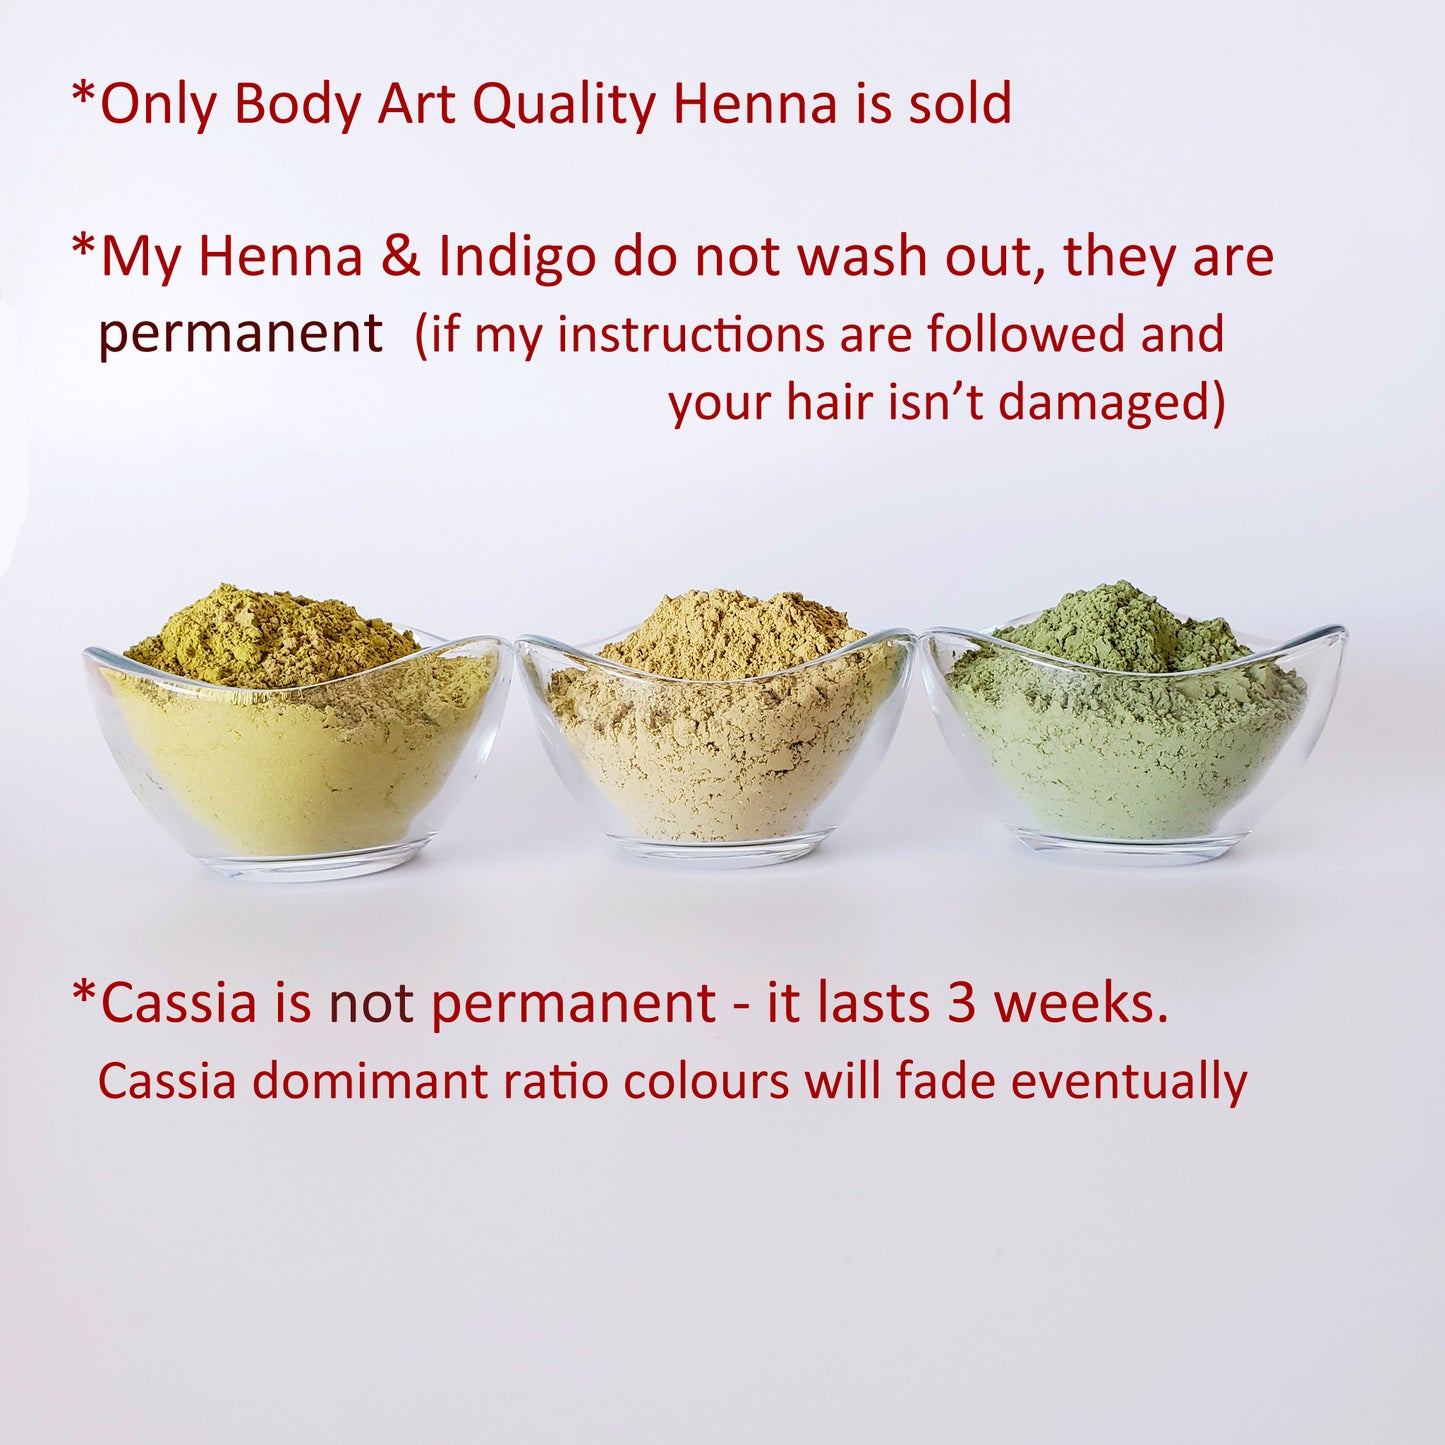
* This kit cannot lighten hair colour
* As Cassia is not permanent & these kits are cassia dominant, the colour might change or fade after 3 weeks of washing.
* I advise only doing root touch ups to avoid darkening the length of your hair into medium - dark brown
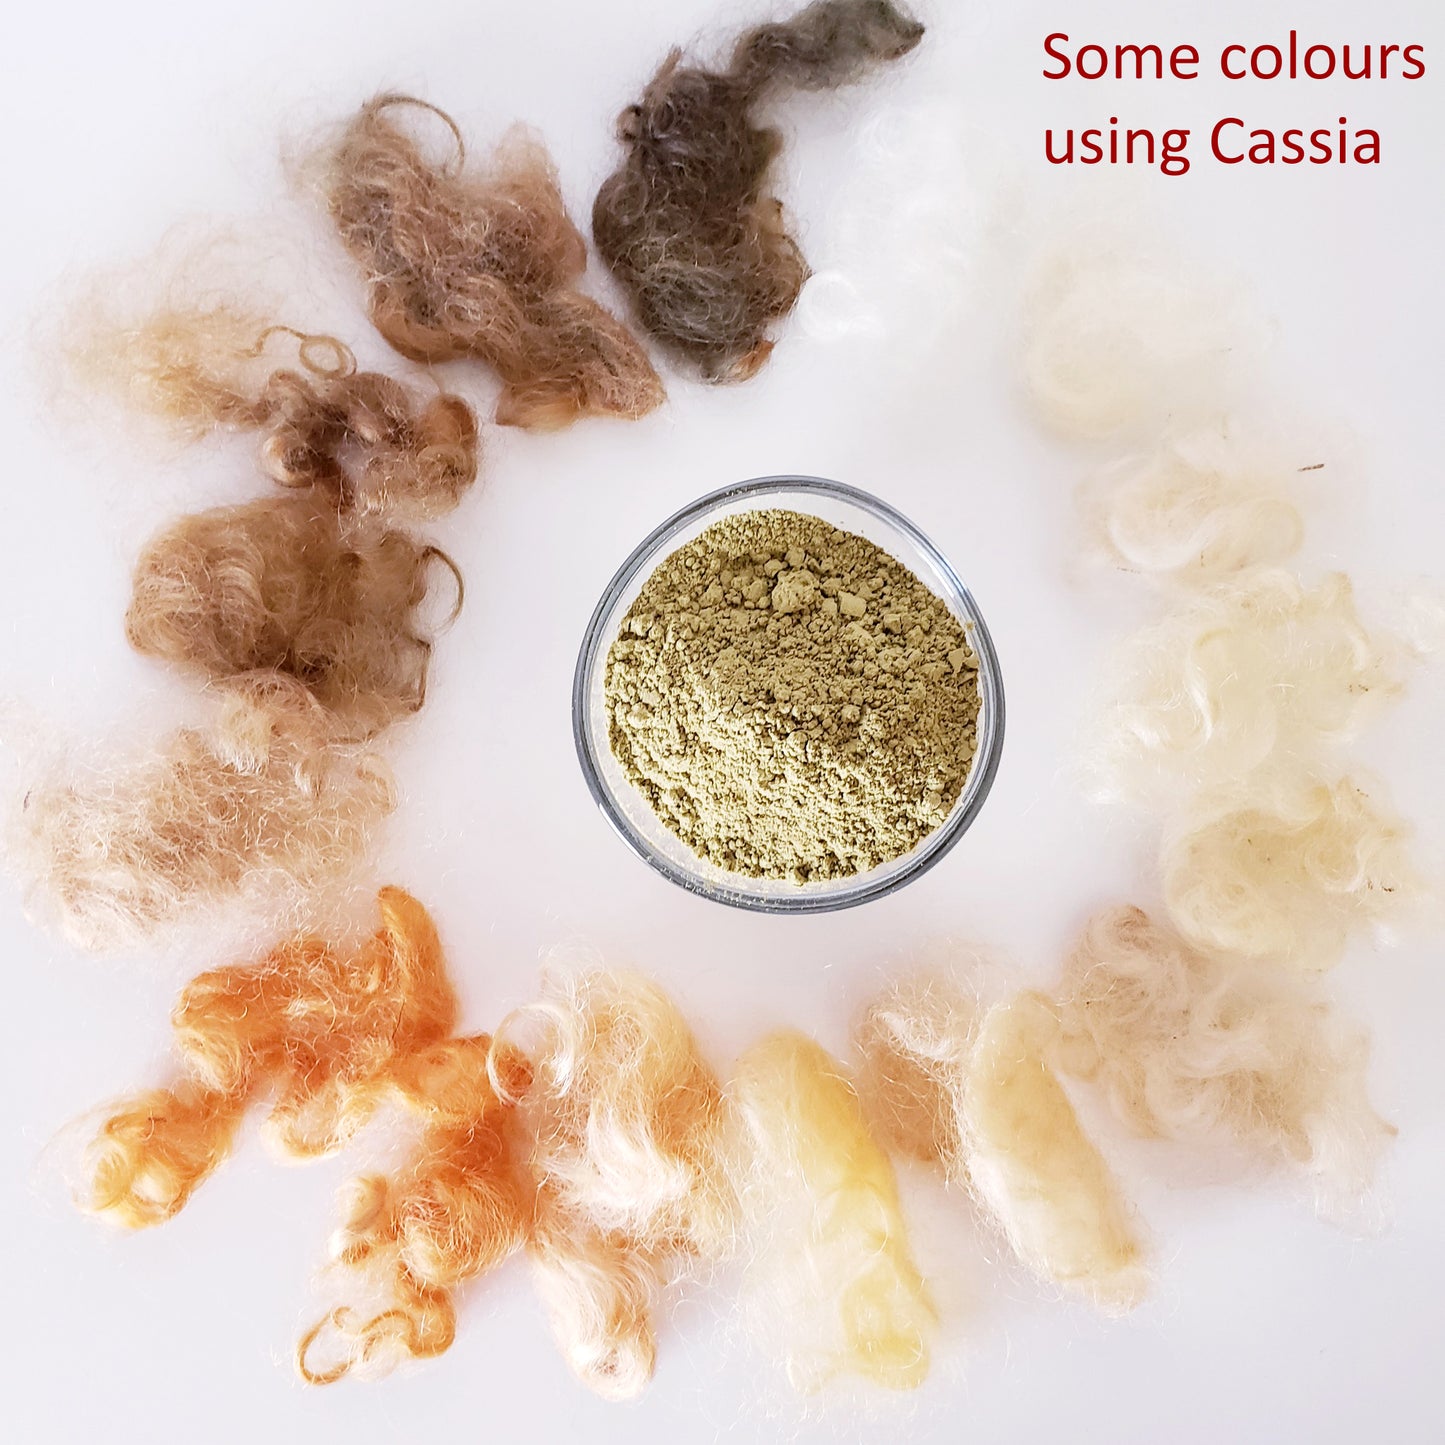
Natural hair dyes are translucent, so the final colour will depend on the starting hair colour.
On white hair, as in my pure white wool samples, the result should be the light browns in the photo.
On darker grey hair or blonde hair, this kit ratio might result in medium brown.
For a certain permanent colour, you would have to go to henna & indigo dominant colour mix like auburn or medium brown.
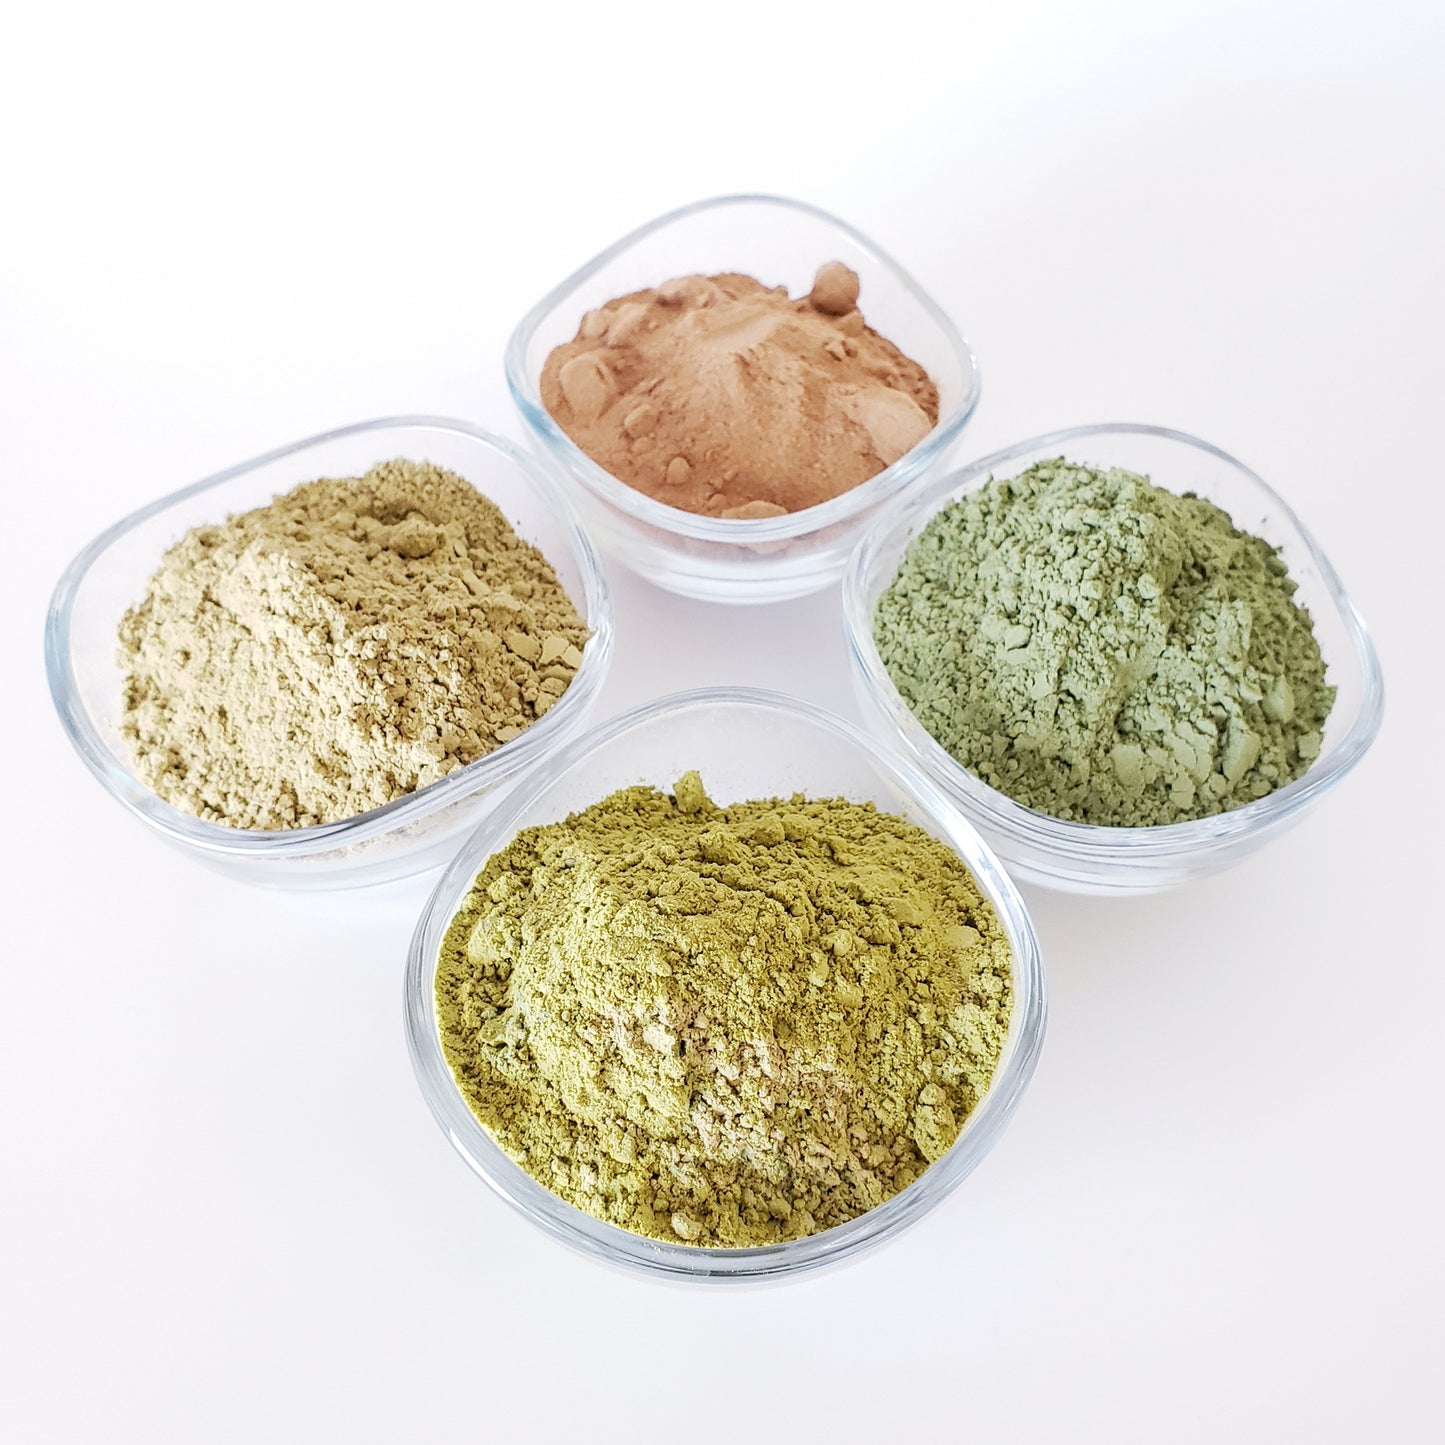
Which fruit acid is used to dye release cassia greatly affect the tone of the brown.
See the article:
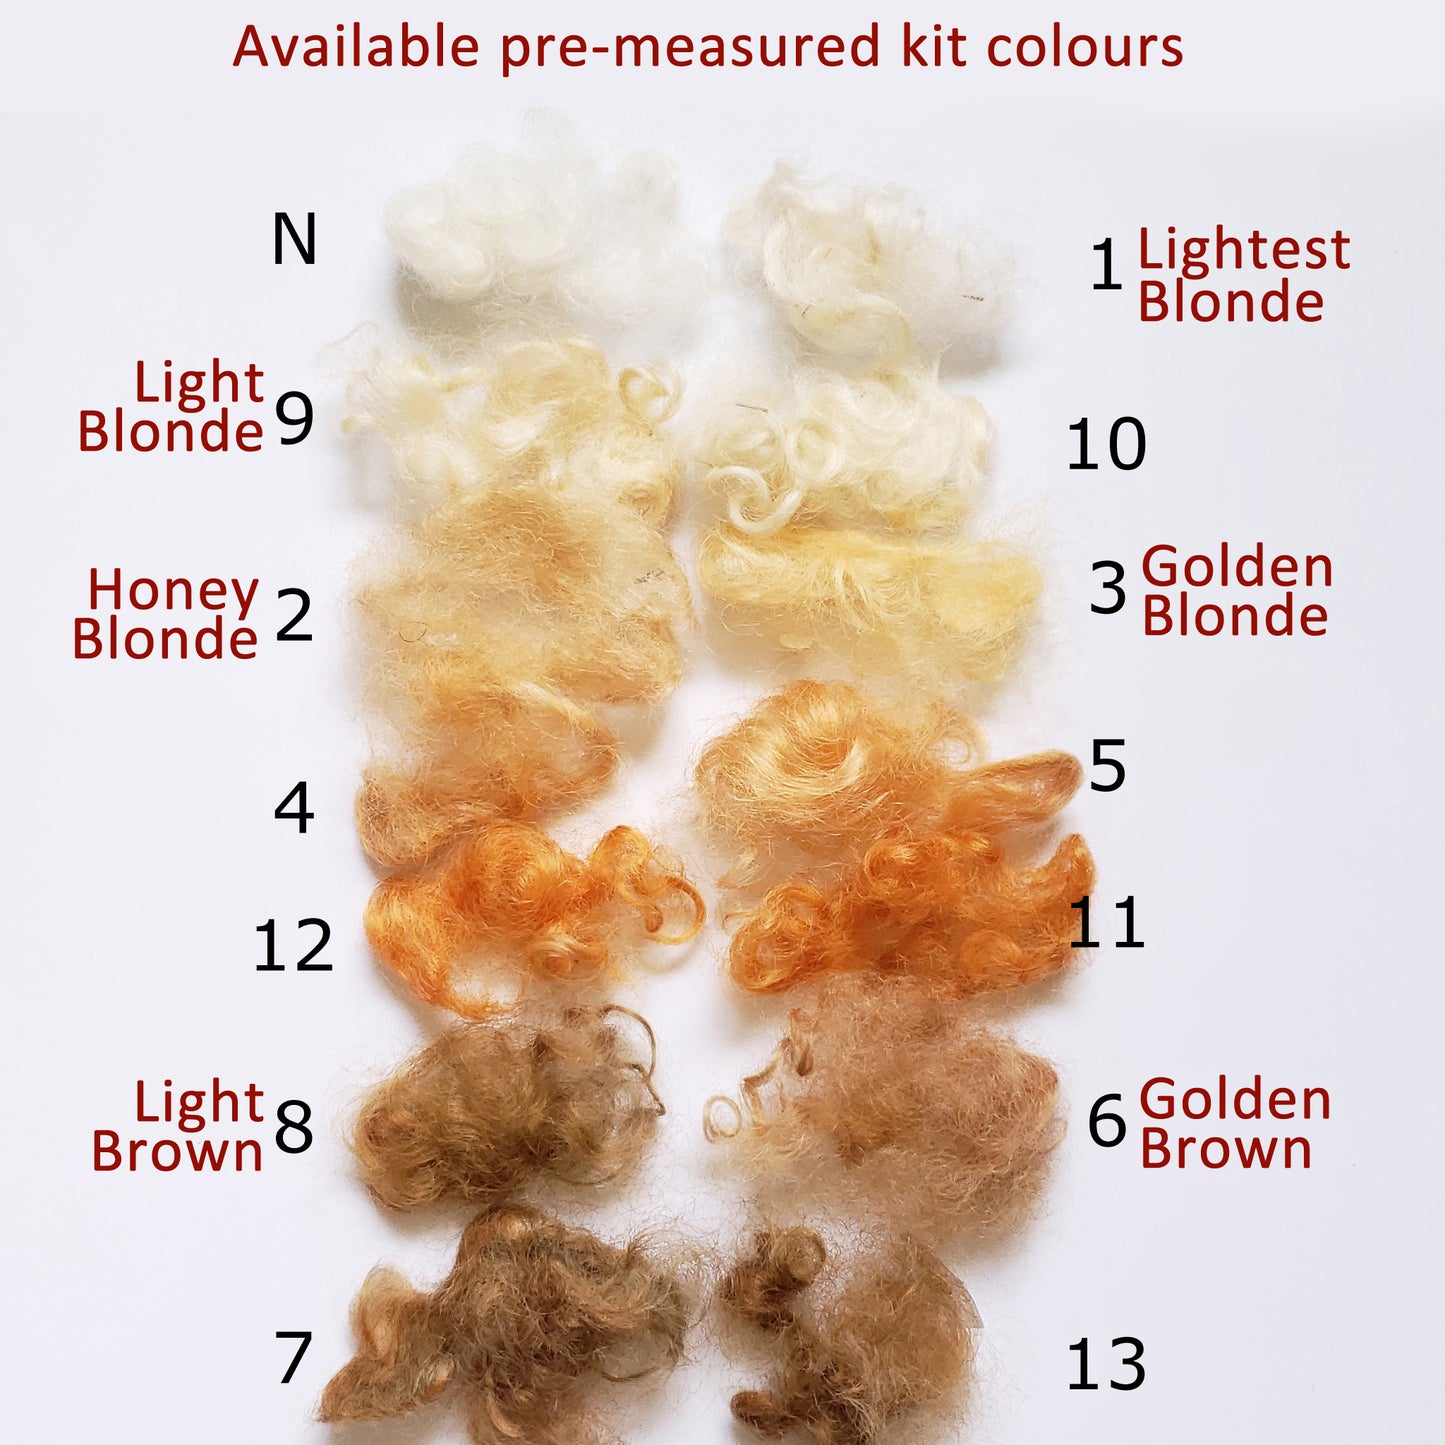
CREATING BLONDES
Jamila henna or Rajasthani henna? The difference is explained in the pictures. Let me know in the "Order Special Instructions" (in your shopping cart link) which you want in your kit.
How much do you need?
How much do you need?
1 kit = shoulder length hair
2 kits = mid back
3 kits = waist length hair
** based on average hair & height. You may need more or less depending on the thickness & density of your hair.
Reminder in case you didn’t read the cassia page information: if you have hard water, cassia can turn your hair greenish – brown – black. If there is a chance you have hard water high in zinc, TEST, TEST, TEST ! Wash hair first with a clarifying shampoo, rinse hair with distilled water.
Materials
Materials
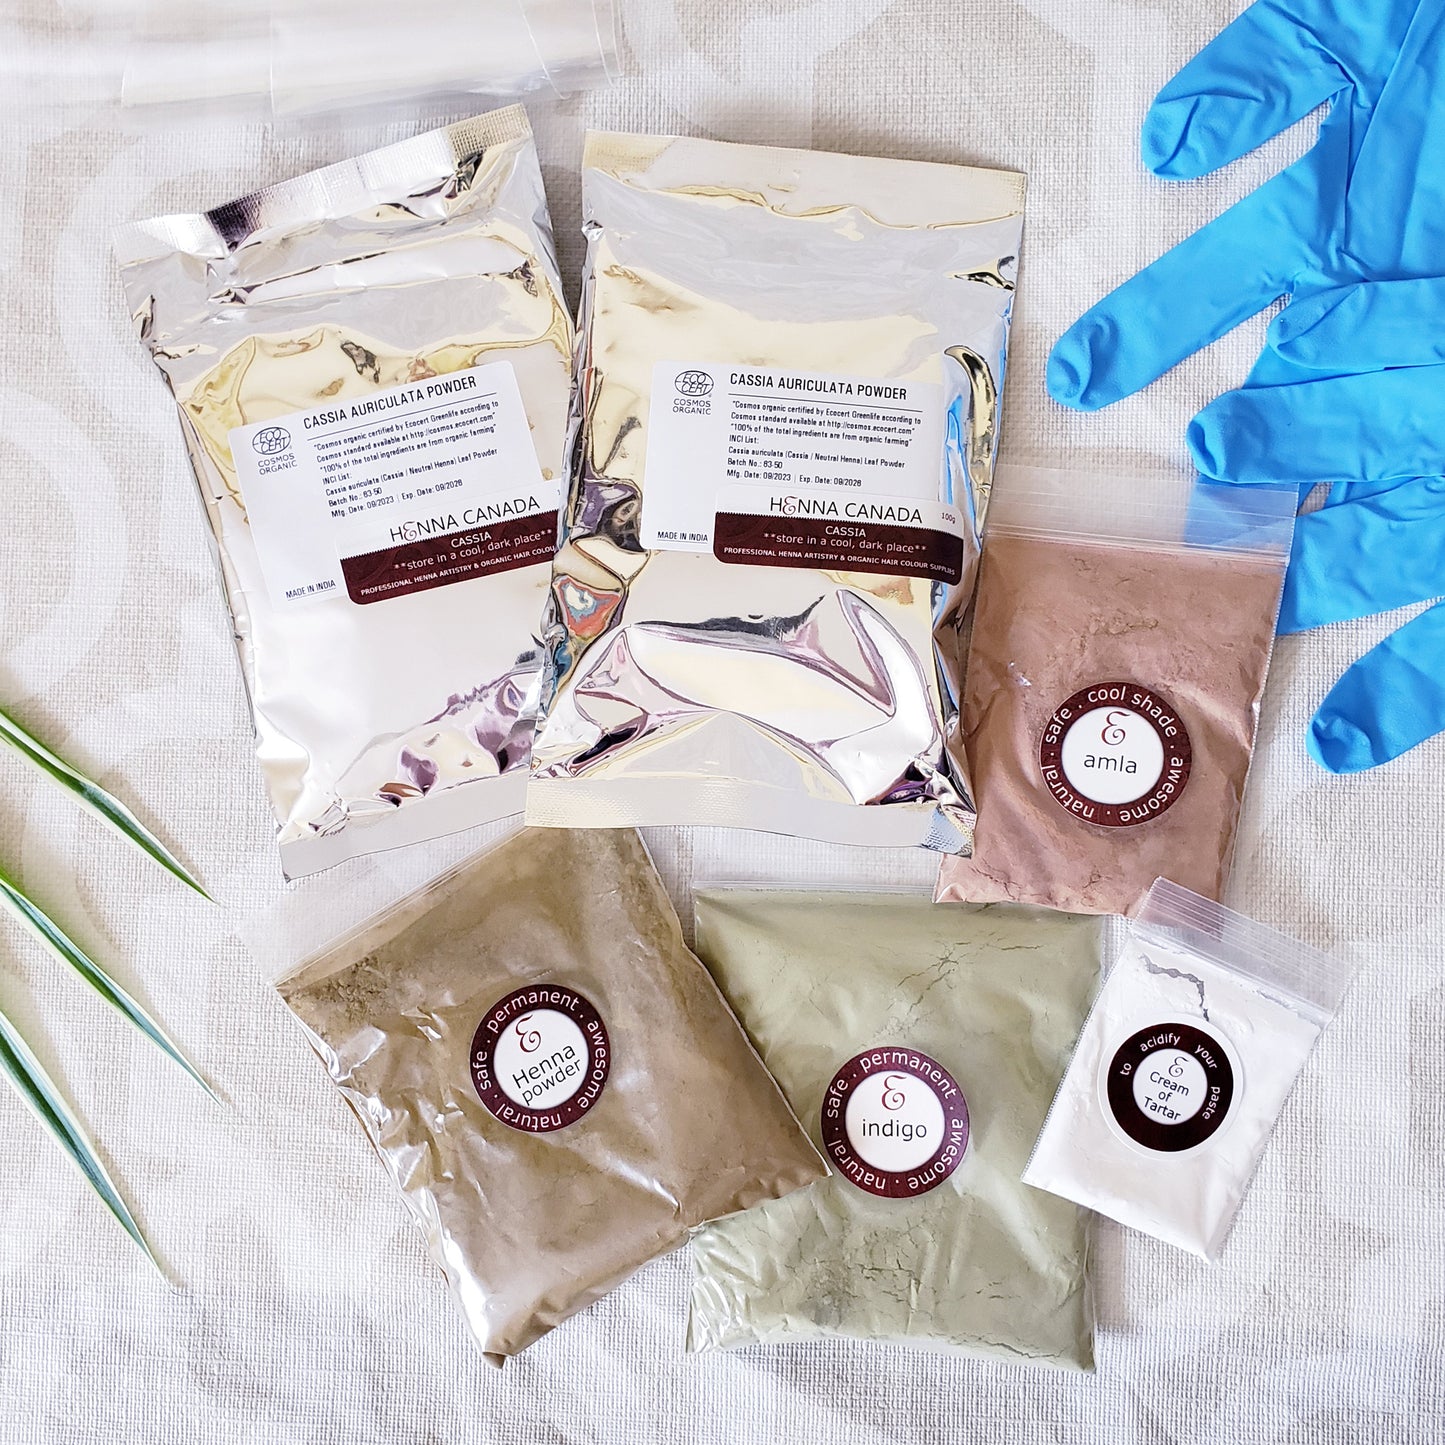
Kits Contains:
Golden Brown:
* 200g Cassia
* 20g Henna
* 20g Indigo
* 20g Amla
* piping bag
* latex-free gloves
* instructions
Light Brown:
* 200g Cassia
* 33g Henna
* 33g Indigo
* 20g Amla
* 16g Cream of Tartar
* piping bag
* latex-free gloves
* instructions
**For this colour, you must dye release with lemon juice from home
How To
How To
Light Brown Kit Hair Dye Instructions:
Read all instructions before you open your henna
*Follow dye release instruction for a small sample test
1. Do a test patch on your inner arm with your paste to test for allergies to either the henna or the fruit acid you’ve chosen. Cover paste with a bandage for the day & check for reactions over the next 2 days. Anyone can have an allergy to a plant.
2. Test with some hair harvested from your brush before you henna all of your hair.
START THE HENNA & CASSIA DYE RELEASE THE DAY BEFORE YOU DYE YOUR HAIR
How long it takes depends on the ambient temperature & which fruit acid you use
1. Combine henna, cassia powder & cream of tartar in a bowl, then add enough distilled or RO water to make a paste. (or, you can add the fruit juice chosen from the blog article on fruit acid options (you can also add amla now if it's in the colour mix you've chosen).
2. Add enough liquid to make a thick paste – like guacamole or a thick yogurt. Whisk out lumps to make sure all powder is combined.
3. Cover the bowl with plastic wrap – making sure the plastic is against the paste.
Then cover bowl with a towel to protect from the lights & let sit to dye release.
Let sit to dye release in a warm spot for 12 hours (over 20 C).
Pro Tip: if you have an oven with a light bulb, put the henna in there to dye release. It provides a consistent dye release time of 12 hours for a low pH paste.
4. TEST FOR DYE RELEASE:
Because of the high cassia content of this colour mix, the normal way of testing for dye release might not work (since cassia can't stain the skin). The normal test is to see if there is a stain on the skin:
Scrape the top paste aside & dip your finger below. Keep henna paste on your fingertip for 5 minutes. Rinse. If there is an orange stain on your fingertip, your henna & cassia are ready! If there's no stain at all: was the top of the paste darker than the paste underneath? If so, you're ready to go.
*If you don’t like the smell of henna, you can add a tsp of ginger powder for 100g of henna powder.
*Do NOT add anything else to your paste, no matter what you read on the internet of have been told through folklore. No egg, yogurt, tea, coffee, oils, conditioners, etc… It will only damage the results.
PREPPING HAIR WHEN THE HENNA IS READY:
Shampoo your hair right before applying paste. If you have hard water, use a lot of styling products or swim in chlorinated pools, a clarifying shampoo is best. If you have dye-resistant non-porous hair, you might even want to wash with something as harsh as dish detergent. Do not use conditioner or any oil product after. Just shampoo & rinse well.
*If you have dye-resistant greys or non-porous hair, you can now use the baking soda trick to help lift your hair cuticle: mix baking soda with enough purified water to make a paste. Apply to dye-resistant hair areas, cover with a plastic cap to keep it moist. Leave it on for 20 minutes. Rinse well.
Towel dry or air dry your hair.
Now you’re ready to dye release you indigo & apply your paste.
Get everything you need ready: non-metallic spoons or spatulas, comb or chopstick for parting hair, your carrot bag, second bowl for indigo, rag for wiping drips or smudges on the skin, plastic cap or bag to cover hair after. Everything has to move very quickly once the indigo is mixed.
MIXING INDIGO:
Indigo doesn’t need to be dye-released. In fact, letting it sit after it’s a paste is BAD.
Try to get the paste in your hair within 20 minutes.
1. In a separate bowl, mix the amount of indigo needed with just enough hot, distilled water to make a paste – like thick yogurt. Add water slowly – it can get too runny quickly. Whisk out lumps to make sure all powder is combined.
2. If dye resistant hair is an issue, add 1 tsp table salt / 100g indigo powder
3. Add the indigo paste to the henna paste & stir very fast. Crazy fast. make sure all indigo paste is fully combined with the henna paste. If not, you'll have uneven colour streaks in the hair.
APPLICATION:
1. Wear gloves & move quickly.
2. Apply paste to small ¼” segments of hair at a time. Make sure that the paste is being massaged each
section so that no hair is missed. Repeat until all hair is coated.
3. Cover head with a plastic shower cap, plastic bag or plastic wrap. Press against the hair – you want it air tight to keep moist & protect from oxygen. If you’re cool, put a towel or knit hat over your head to keep warm. Heat helps the dye bind.
4. If you have dye-resistant or non-porous hair, blasting your head with heat from a hair dryer outside of your plastic cap & hat for 15 minutes.
5. Leave the paste on for 2 - 4 hours. Make sure the paste moist & warm.
Indigo needs to be applied quickly because once it oxidizes, it won’t bind to the hair anymore. So if your indigo paste is turning from a green paste to blue, it’s demised.
RINSING:
If you have long, thick or super curly hair, the mermaid method will be the easiest way for you to start rinsing out the henna: soak in a bathtub & massage your scalp, swish your hair until you feel like most of the paste is out. Then you can move to a shower to rinse out the rest. If residue is left behind, your scalp will feel itchy & your hair will feel dry, so make sure you rinse until the water runs clear. There’s no need to shampoo, you can condition.
DO NOT oil your hair with coconut oil – if can pull out loose indigo.
*DO NOT blow your hair dry or use heat styling for the next week… just air dry.
THE WAIT & AFTERCARE:
It takes 2 – 5 days for the henna to oxidize (darken) into its final colour. Wait at least 4 days to judge the colour & henna again for touch-ups or to change to a different colour mix. Heat (blow dryer & heat styling) can make the hair darker during the 5 day oxidation period, that’s why you want to just air dry for the first week, until you see the final colour.
If your hair feels dry, don’t worry, the follicles are just a little bumpy from the lawsone dye binding. In a few washes & conditioning sessions, the cuticles will settle back down.
IF YOU DECIDE IT’S TOO DARK RIGHT AFTER RINSING OUT:
As soon as possible:
1 – saturate your hair in warm coconut oil (like a hot oil treatment). Keep head hot with oil in for a few hours. Shampoo the oil out.
2 – mix enough vitamin C powder with shampoo to make a thick, gritty paste. Massage in into your hair, making sure not to miss any. Cover with a plastic cap & let sit 2 hours. Then lather & rinse out until water runs clear.
Check the colour. If it’s still too dark, you can do both steps again. After that just keep repeating the Vitamin C shampoo method. There will come a time when it’s apparent that no more indigo is going to come out, but hopefully it will have lightened enough!
Share