


Henna Canada
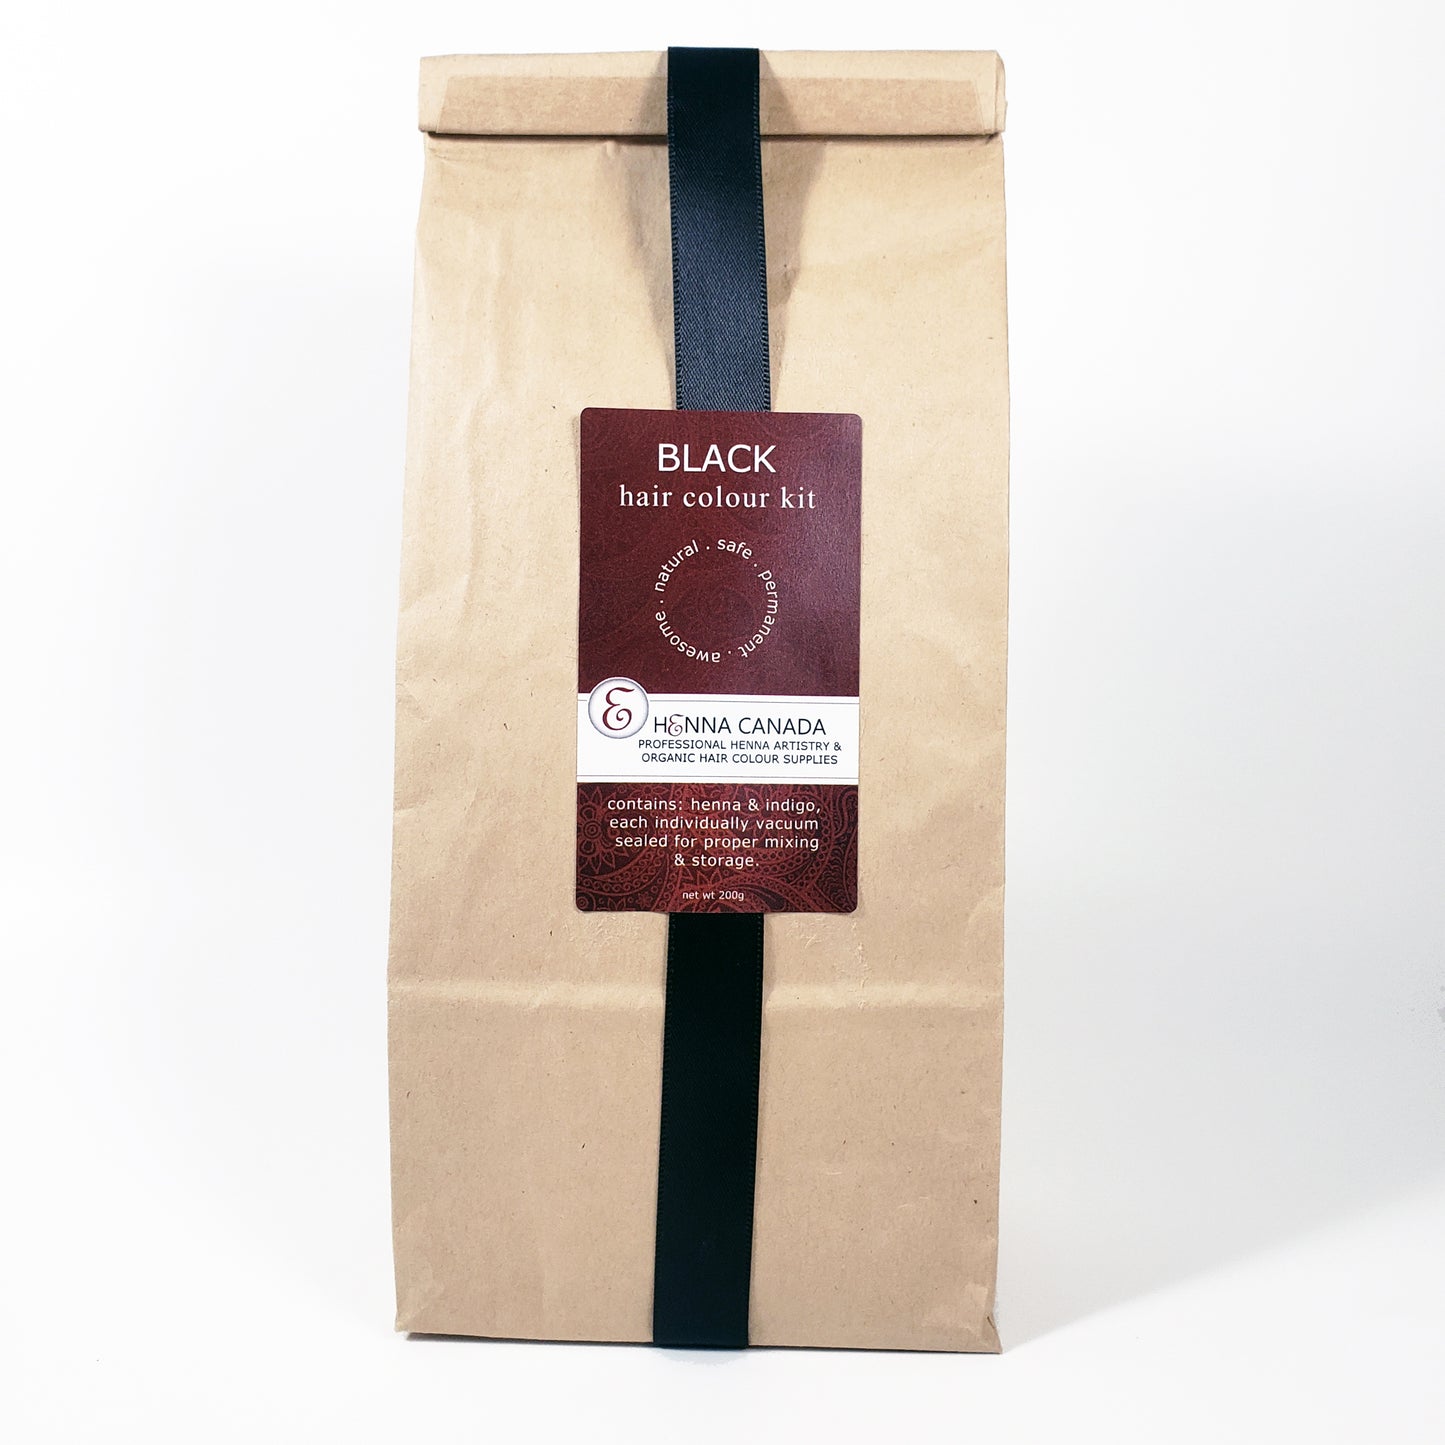
Ebony (Black) Henna Hair Kit
Ebony (Black) Henna Hair Kit
Impossible de charger la disponibilité du service de retrait
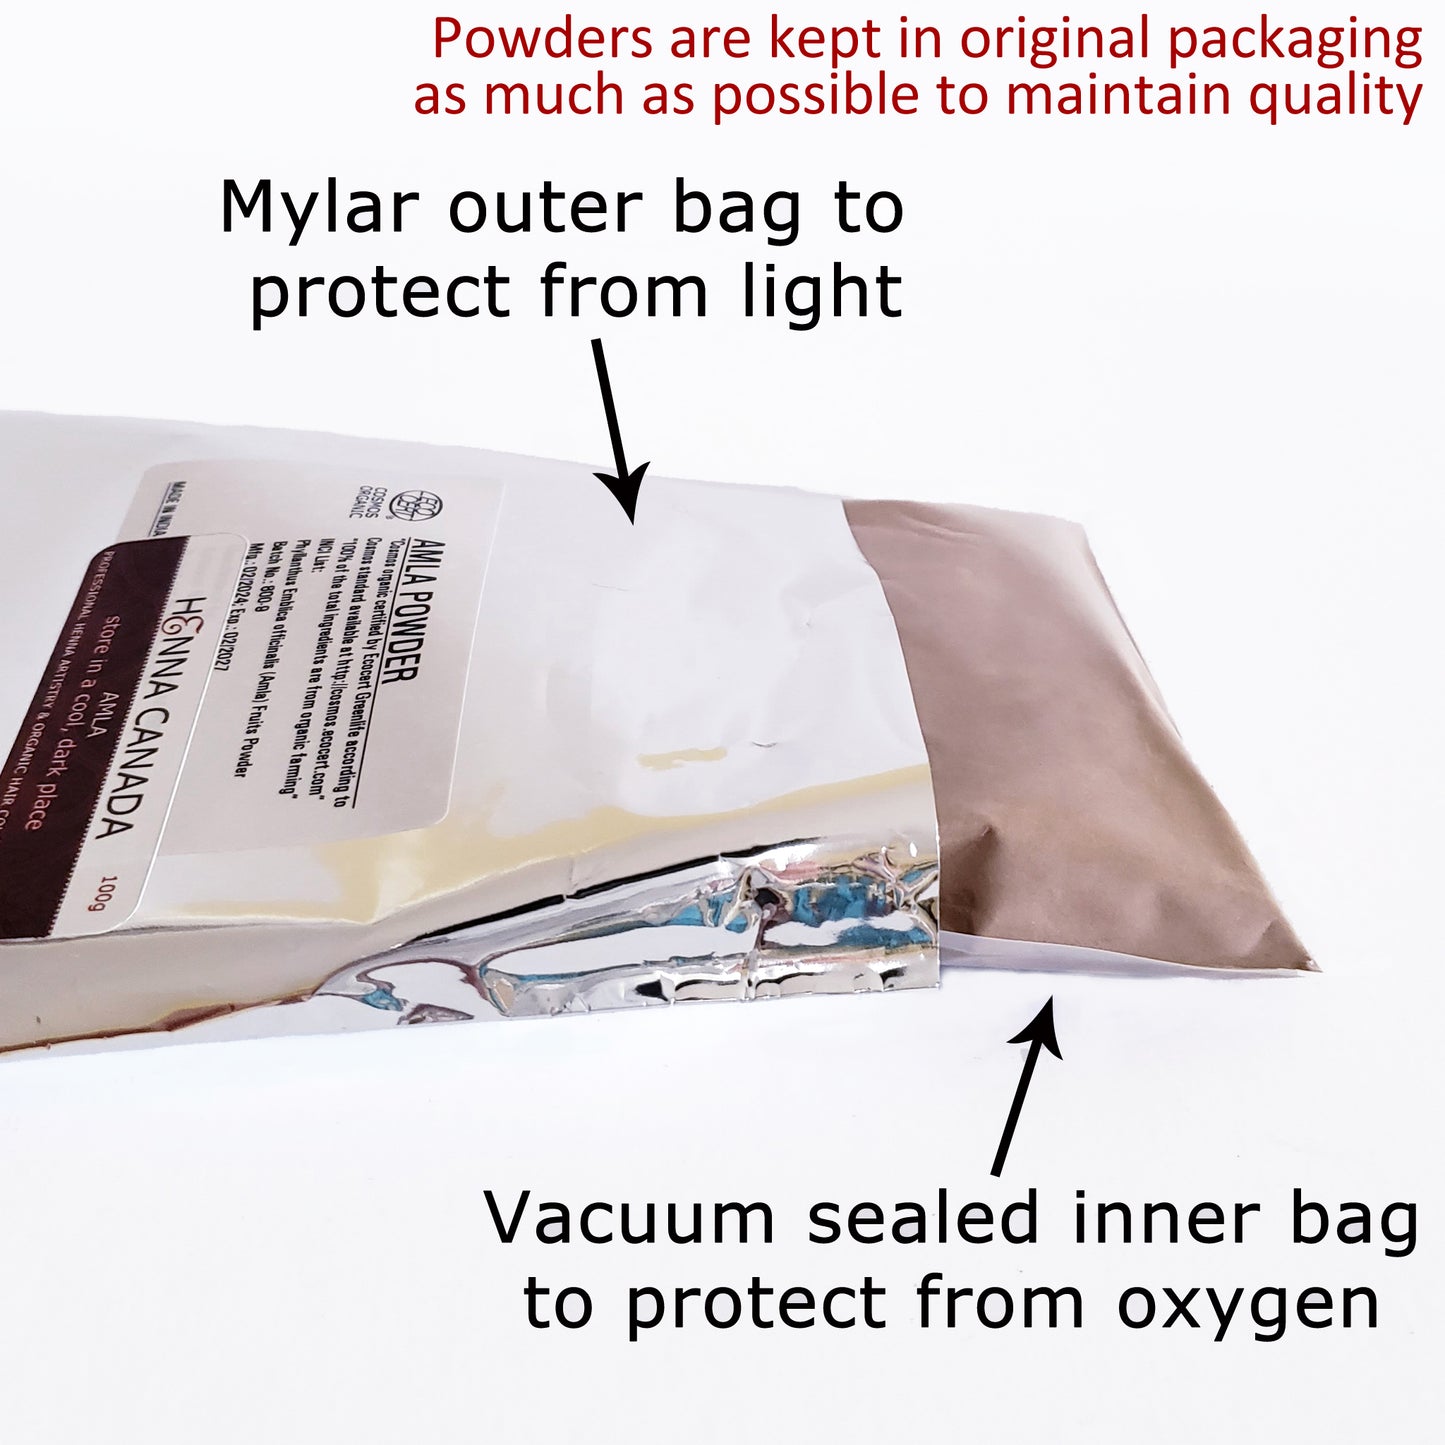
Details
Details
Not sure what to do and a kit sounds like a good idea? I have you covered ;)
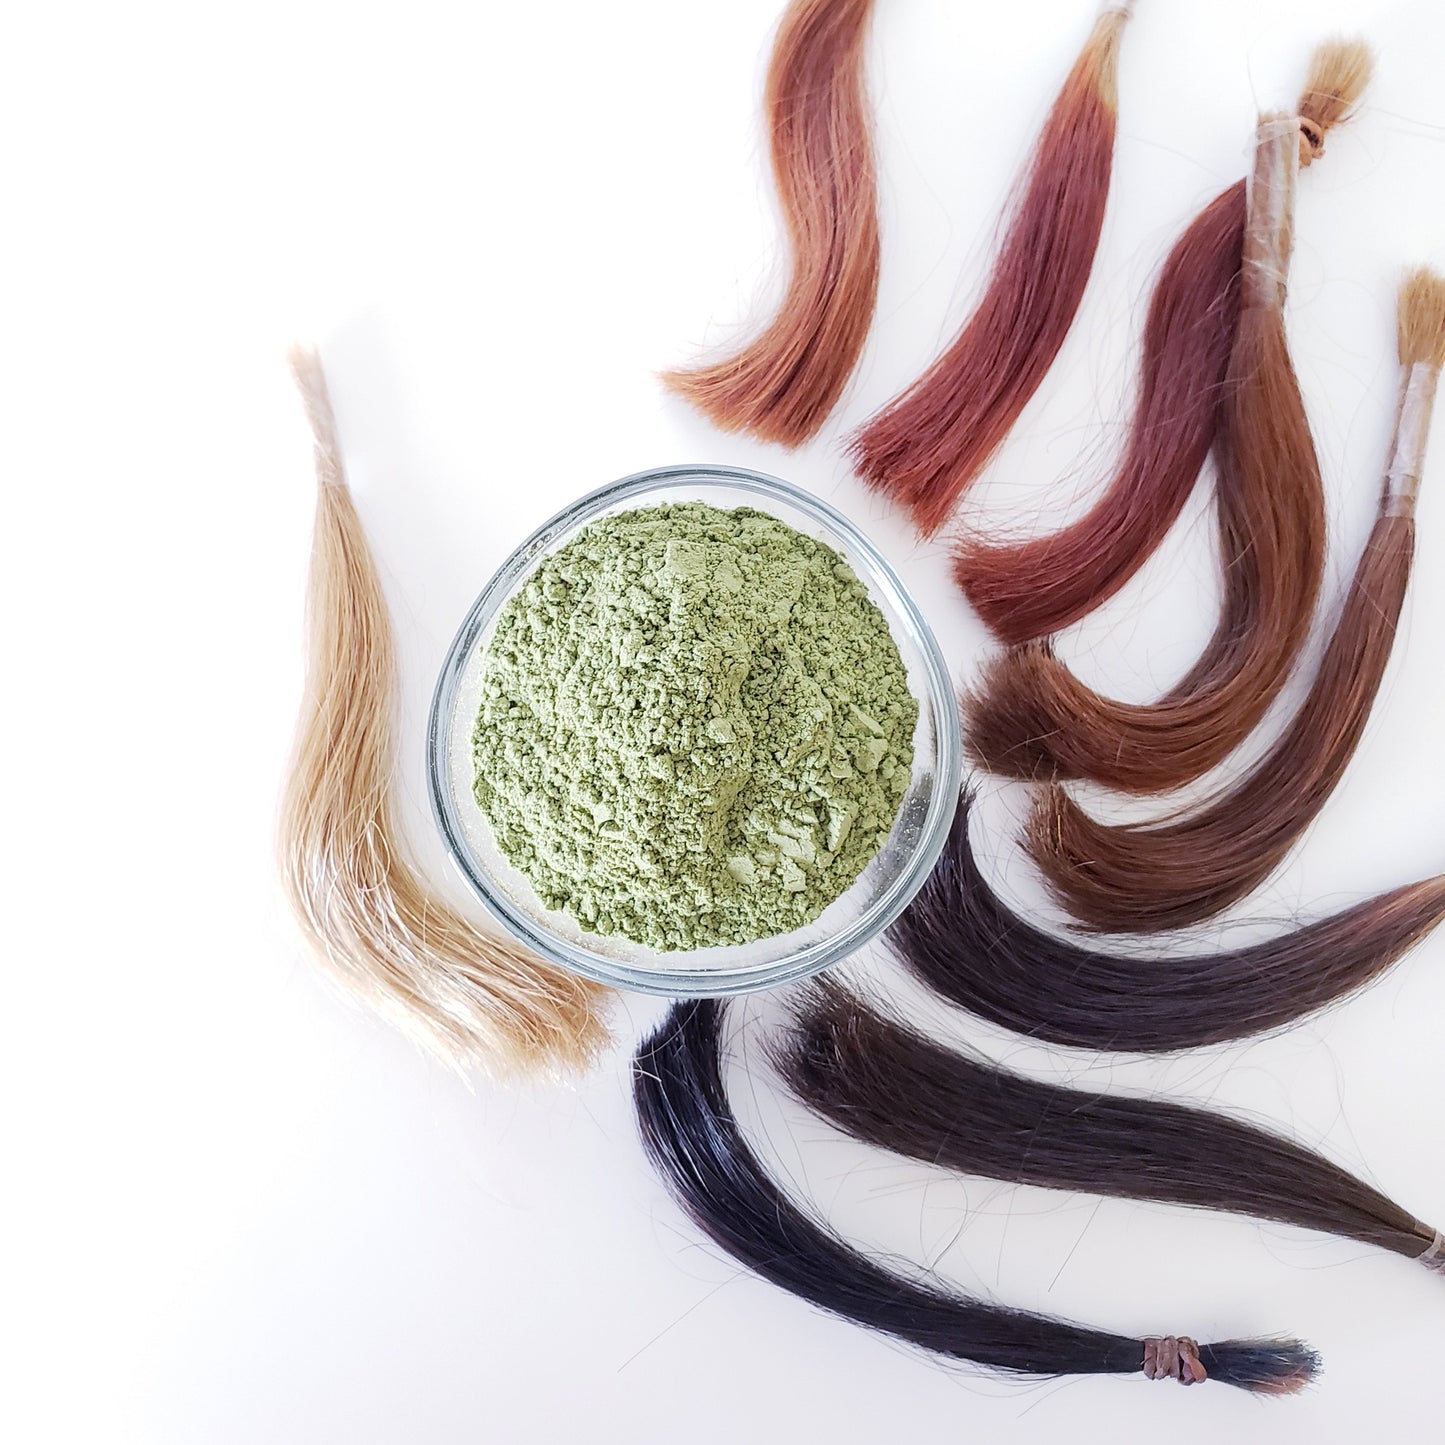
When dye released & applied correctly, pure black hair should always be the result. In the case of dye-resistant grey hair, tips will be included in the instructions :)
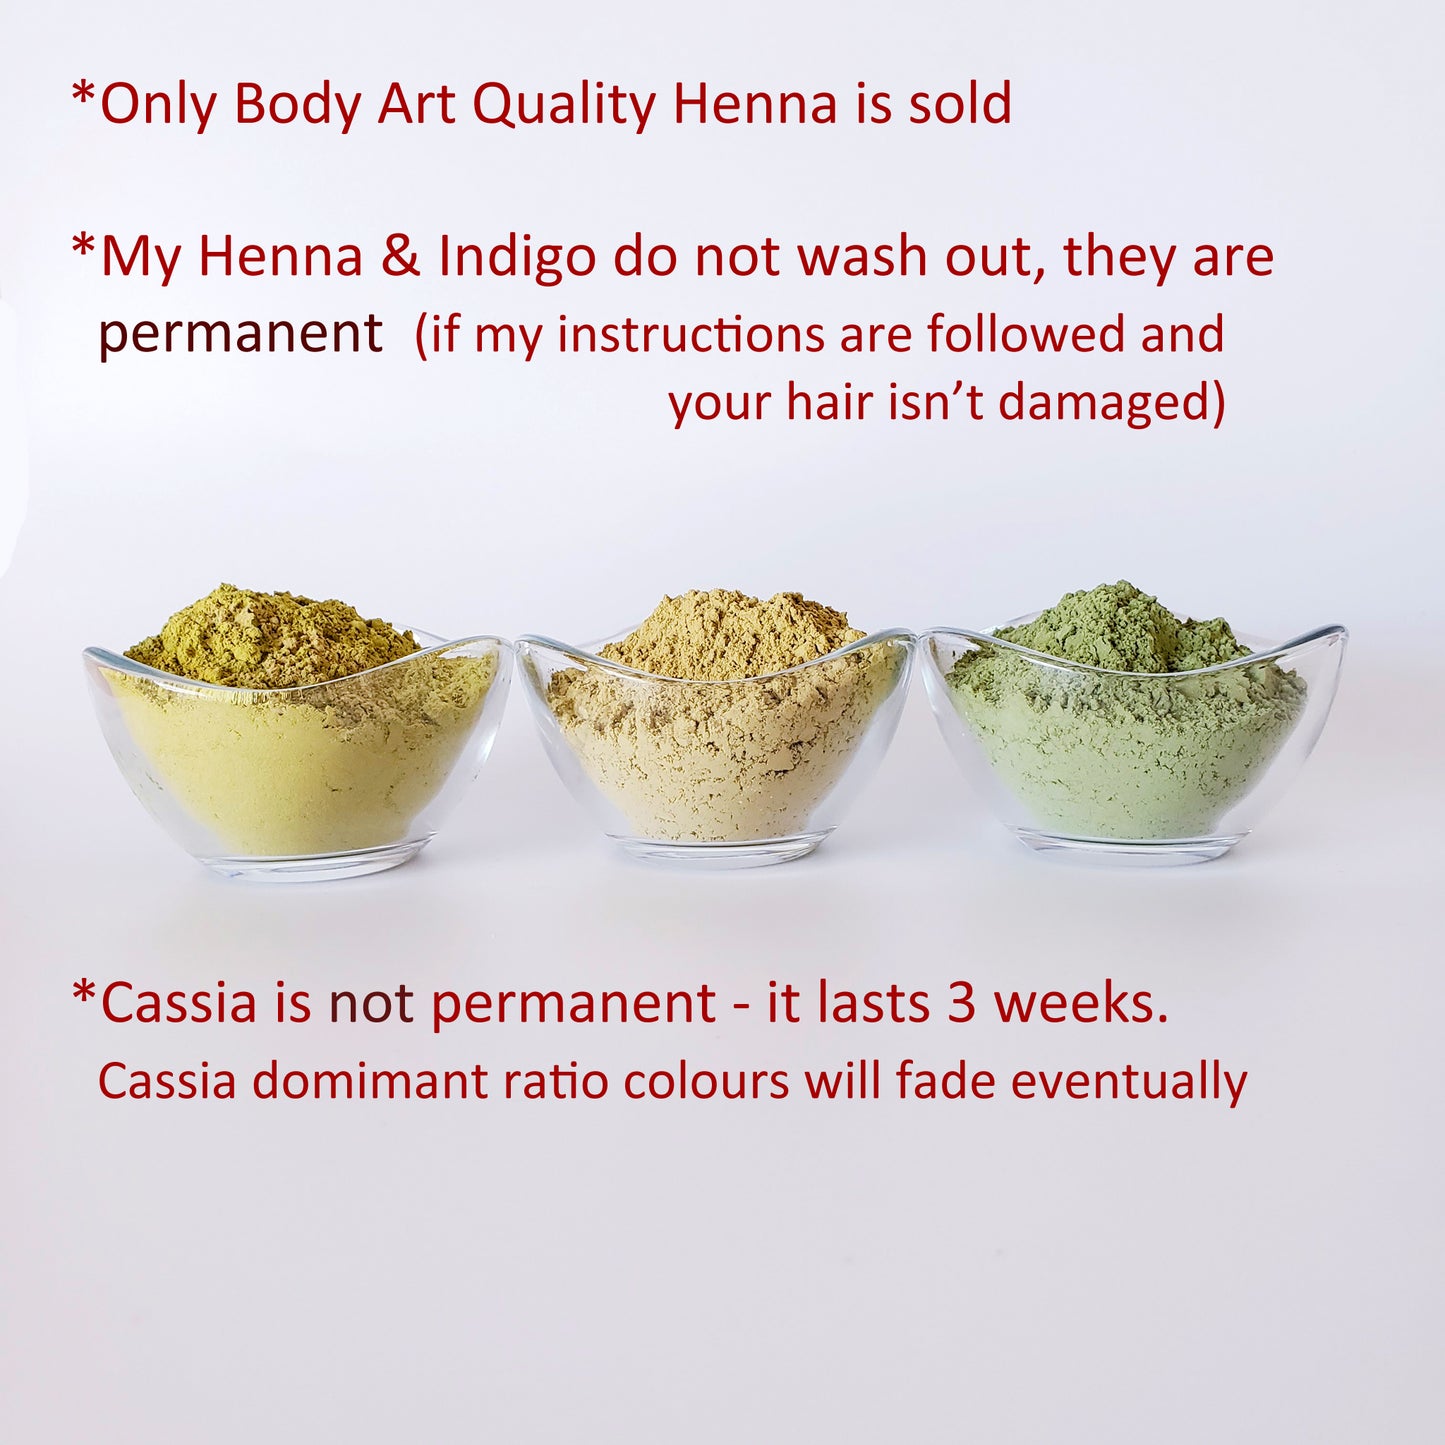
* This colour is permanent (if your hair isn't damaged & the instructions are followed)
How much do you need?
1 kit = nape of neck
2 kits = shoulder length hair
3 kits = shoulder blade to mid back
4 kits = mid back to waist
** based on average hair & height. You may need more or less depending on the thickness & density of your hair
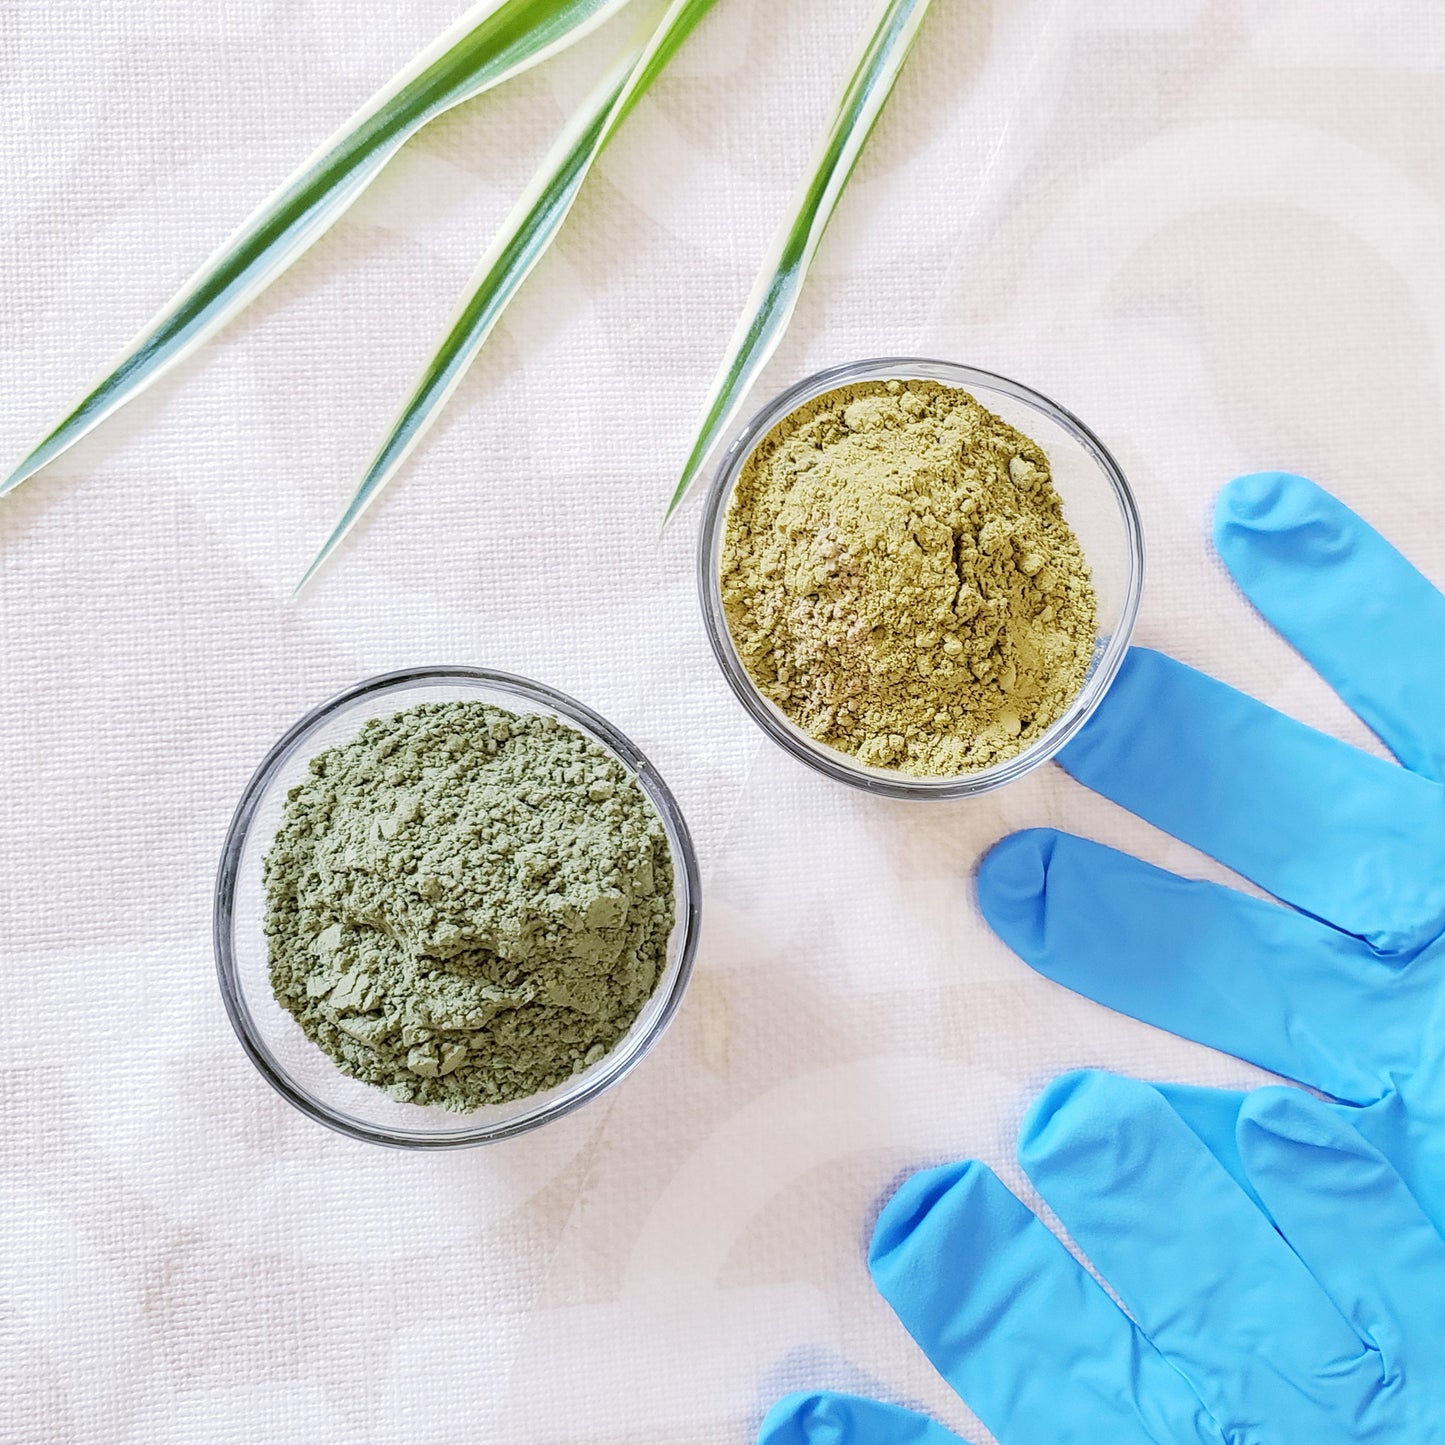
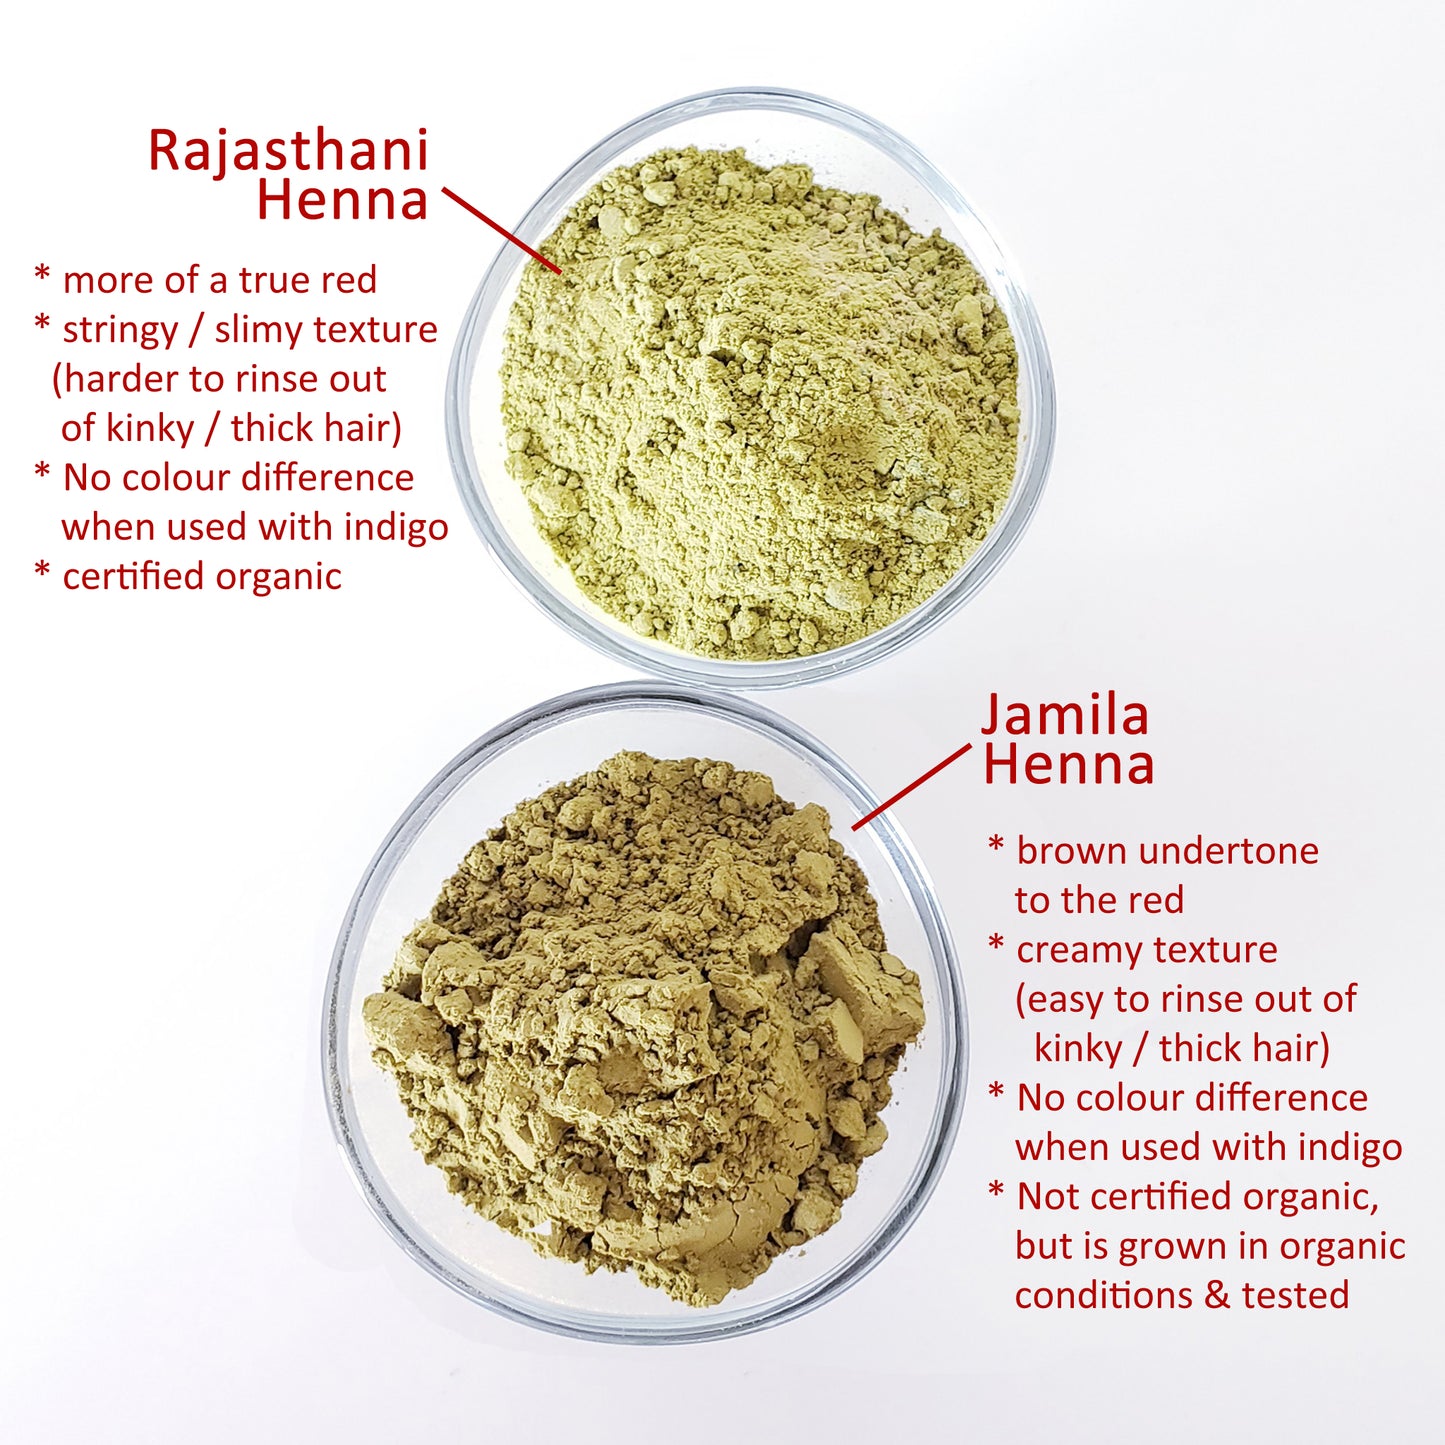
Jamila henna or Rajasthani henna? The difference is explained in the pictures. Let me know in the "Order Special Instructions" (in your shopping cart link) which you want in your kit.
Materials
Materials
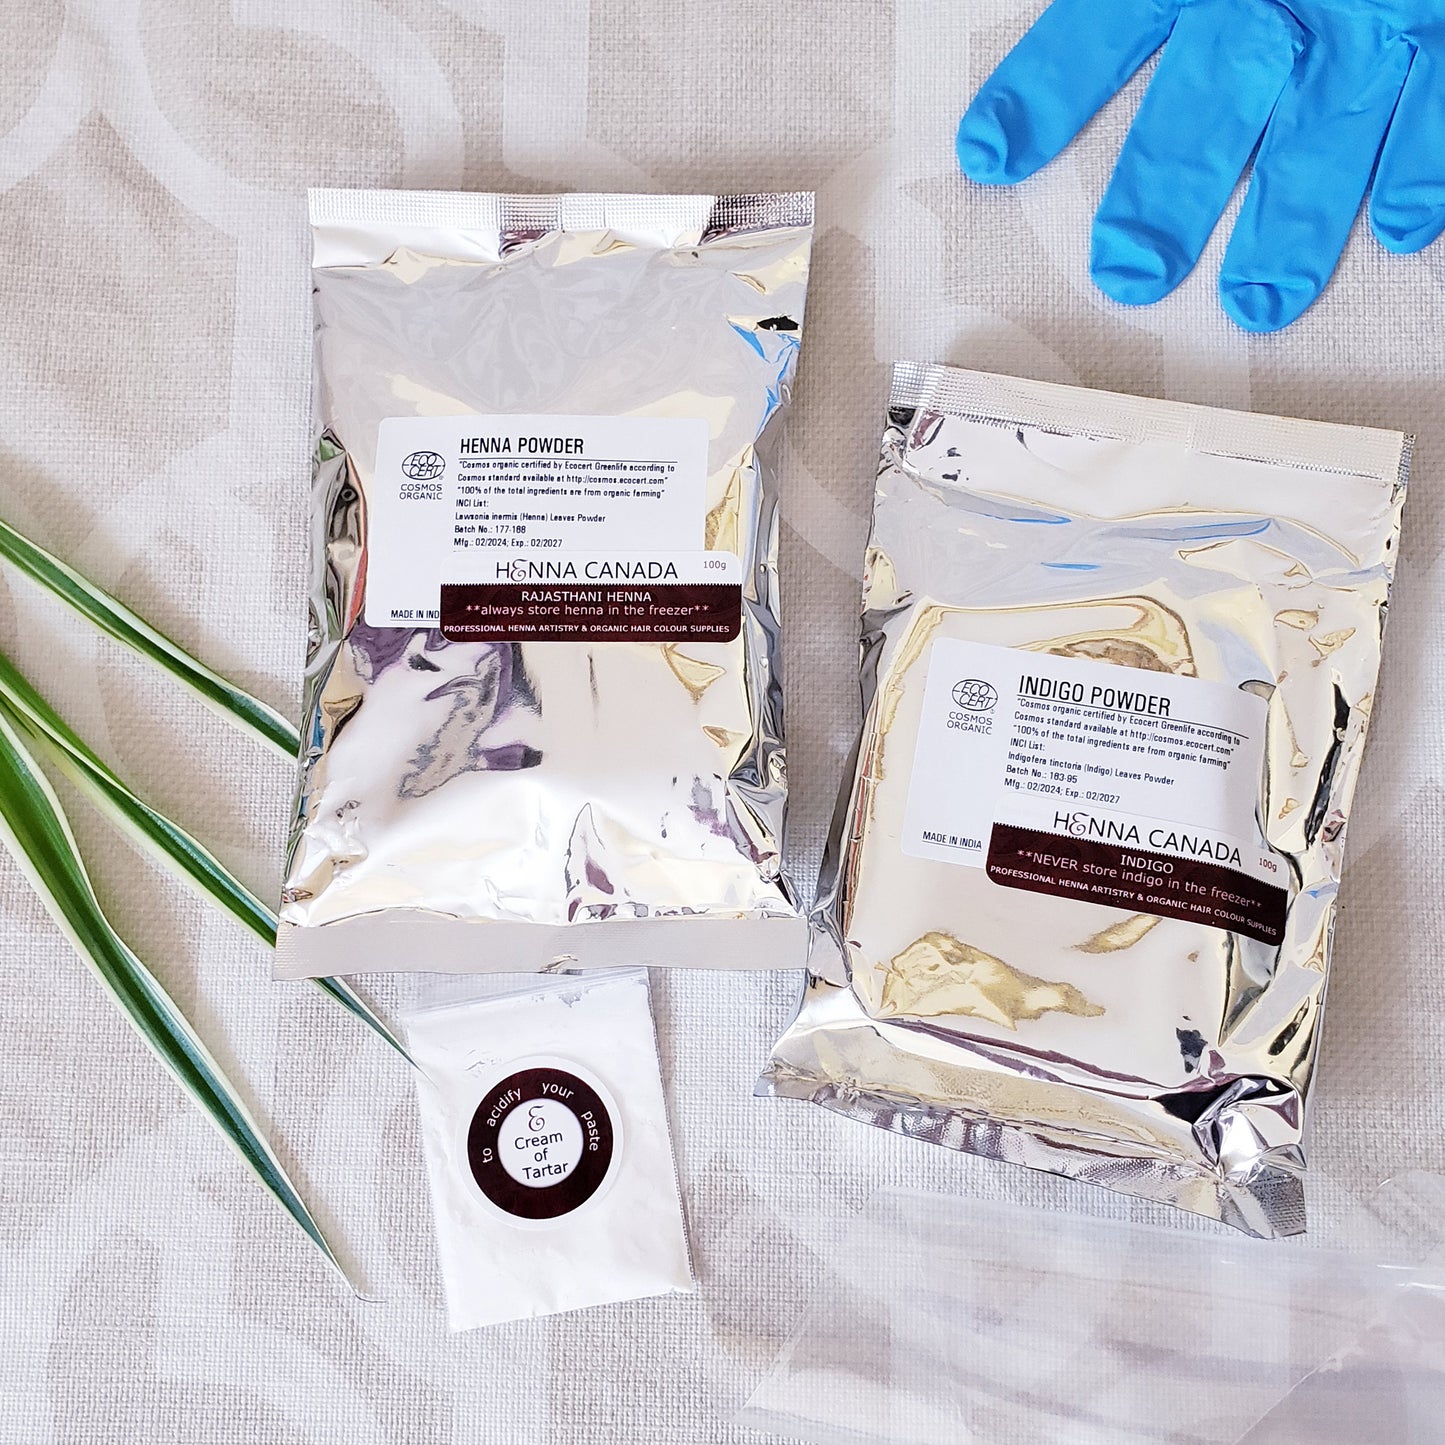
Kit Contains:
* 100g Body Art Quality Henna - you choose the type!
* 100g Indigo
* 6g cream of tartar as your acid
* piping bag
* latex-free gloves
* instructions
* 25g amla if buying the cool black kit
In the "Special instructions for seller" box that comes up when you add to cart, please let me know what type of henna (jamila or rajasthani).
Rajasthani vs Jamila henna:
Raj is very stringy - not suitable for kinky or super thick hair
Jamila is very creamy & easier to rinse out
How To
How To
You'll henna your hair first, rinse it out, then indigo your hair.
This is the only natural way to get permanent black hair.
BEFORE YOU DYE YOUR HAIR:
Read all instructions & do your test patches:
*Follow dye release instruction for a small sample test (1 tsp of powder):
1. Do a test patch on your inner arm with your paste to test for allergies to either the henna, the fruit acid you’ve chosen or indigo. Cover paste with a bandage for the day & check for reactions over the next 2 days. Anyone can have an allergy to a plant.
2. Test with some hair harvested from your brush before you henna all of your hair
HENNA PHASE:
TO DYE RELEASE / MAKE HENNA PASTE:
How long it takes depends on the ambient temperature & which fruit acid you use
1. Combine henna powder & your chosen fruit juice or powder* with distilled water to a bowl (avoid stainless steel).
*Learn about fruit acid options here: https://www.hennacanada.ca/blogs/instructions/fruit-acids-list-for-dye-release
If you are using amla for a cool black, add it now.
2. Add enough liquid to make a thick paste – like guacamole or a thick yogurt. Whisk out lumps to make sure all powder is combined.
3. Cover the bowl with plastic wrap – making sure the plastic is against the paste. Tip for later: put a piece of paper towel or tissue over the plastic wrap. Then cover bowl with a towel to protect from the lights & let sit to dye release.
Depending on ambient temperature & the fruit acid you used, dye release can take anywhere from 4 hours to 24 hours:
Hotter temperature (30 C) & higher pH (apply juice, orange juice) = faster dye release of 4 – 6 hours
Lower temperature (20 C) & lower pH (lemon juice, vinegar) = slower (but better) dye release of 8 – 24 hours
Pro Tip: if you have an oven with a light bulb, put the henna in there to dye release. It provides a consistent dye release time of 12 hours for a low pH paste.
TEST FOR DYE RELEASE:
Depending on your temp & pH example above, estimate when you need to start checking your paste.
Check the paper towel / tissue. If it's not stained orange, let it sit longer.
If the paper towel has an orange stain on it, it's time to test your paste!
Scrape the top paste aside & dip your finger below. Keep henna paste on your fingertip for 5 minutes. Rinse. If there is a vibrant, rich orange stain on your fingertip, your henna is ready! If it's a light, dull orange stain, wait another 2 hours & test again.
If you don’t like the smell of henna, you can add a tsp of ginger powder for 100g of henna powder.
Do NOT add anything else to your paste, no matter what you read on the internet of have been told through folklore. No egg, yogurt, tea, coffee, oils, conditioners, etc… It will only damage the results.
PREPPING HAIR WHEN THE HENNA IS READY:
Shampoo your hair right before applying paste. If you have hard water, use a lot of styling products or swim in chlorinated pools, a clarifying shampoo is best. If you have dye-resistant non-porous hair, you might even want to wash with something as harsh as dish detergent. Do not use conditioner or any oil product after. Just shampoo & rinse well.
*If you have dye-resistant greys or non-porous hair, you can now use the baking soda trick to help lift your hair cuticle: mix baking soda with enough purified water to make a paste. Apply to dye-resistant hair areas, cover with a plastic cap to keep it moist. Leave it on for 20 minutes. Rinse well.
Towel dry or air dry your hair.
Now you’re ready to apply your paste.
APPLICATION:
1. Wear gloves
2. Section your hair to make it easier for you to apply the paste. If it's your first time and you have long hair, maybe try a few different methods of sectioning your hair, before your henna is ready, to make sure you won't miss any spots before you jump into applying the paste - it can be messy your first go!
3. Make the paste is a good consistency to work with. Runny paste is a horror, so be careful to add very small amounts of liquid & stir constantly. What you're looking for is a thick icing consistency – can be smooshed thickly into hair sections & won't drip or run. If you accidentally made it too runny, add a little more henna or cassia powder. It won’t be dye released, so it won’t affect your colour. You can also use ziziphus to thicken if you have bought some for natural hair cleaning.
4. Apply paste to small ¼” segments of hairs at a time. Make sure that the paste is being massaged each section so that no hair is missed. Repeat until all hair is coated.
5. Cover head with a plastic shower cap, plastic bag or plastic wrap. Press against the hair – you want it airtight to keep moist & protect from oxygen. If you’re cool, put a towel or knit hat over your head to keep warm. Heat helps the henna bind.
6. If you have dye-resistant or non-porous hair, blasting your head with heat from a hair dryer outside of your plastic cap & hat for 15 minutes will help.
7. Leave the paste on hair for 2 hours minimum. 4 hours+ for greys & non-porous. You can even go to bed with it. Just keep the paste moist & warm.
RINSING:
If you have long, thick or super curly hair, the mermaid method will be the easiest way for you to start rinsing out the henna: soak in a bathtub & massage your scalp, swish your hair until you feel like most of the henna is out. Then you can move to a shower to rinse out the rest.
Towel dry or fully air dry your rinsed, henna'ed hair.
INDIGO PHASE:
Indigo doesn’t need to be dye-released. In fact, letting it sit after it’s a paste is BAD. Don’t make your indigo paste until right before you’re going to apply it. (so hair is towel dried or air dried after rinsing out henna & sectioned for easier application; gloves are ready, plastic to cover head is beside you).
1. In any bowl, mix the amount of indigo needed with just enough warm, distilled water to make a paste – like thick yogurt. Add water slowly – it can get too runny quickly. Whisk out lumps to make sure all powder is combined.
2. If dye resistant hair is an issue, add 1 tsp table salt / 100g indigo powder
APPLICATION & RINSING:
same as for henna.
Indigo needs to be applied quickly because once it oxidizes, it won’t bind to the hair anymore. So if your indigo paste is turning from a green paste to blue, it’s demised.
There’s no need to shampoo, you can condition.
DO NOT oil your hair with coconut oil – if can pull out loose indigo.
THE WAIT & AFTERCARE:
It takes 2 – 5 days for the henna to oxidize (darken) into its final colour. You can darken to a black faster by blowing dry with a hair dryer.
If your hair feels dry, don’t worry, the follicles are just a little bumpy from the lawsone dye binding. In a few washes & conditioning sessions, the cuticles will settle back down.
IF IT’S TOO DARK
You decided that you don't like the look of black:
Indigo is very difficult to remove (even chemically with the hair dresser). There are only 2 things I’m aware of that will help take some of the indigo out to lighten the colour, but you need to do them as soon as possible.
1 – saturate your hair in warm coconut oil (like a hot oil treatment). Keep head hot with oil in for a few hours. Shampoo the oil out.
2 – mix enough vitamin C powder with shampoo to make a thick, gritty paste. Massage in into your hair, making sure not to miss any. Cover with a plastic cap & let sit 2 hours. Then Lather & rinse out until water runs clear.
Check the colour. If it’s still too dark, you can do both steps again. After than just keep repeating the Vitamin C shampoo method. There will come a time when it’s apparent that no more indigo is going to come out, but hopefully it will have lightened enough!
Share

The Henna Canada Products: I always wanted to try henna as an alternative to chemical hair coloring but my attempts, in the past, from buying henna from health food stores were never successful. These hennas were somehow poor quality and the henna and indigo premix don’t really work well. In early December 2024, I discovered Henna Canada. The website was well done, and the reviews were positive, so I decided to try the Ebony black (my natural hair color) Henna Hair Kit. To be honest, I never expected the result to be so good, to look so natural and to be permanent. I really thought that the henna die would not fully cover my gray and would fade away after a few shampoos. Well, no, the gray is fully covered and a month later, my color still looks perfect, and the coloring is really permanent! Henna Canada’s henna is impressive.
Now onto the customer service: Lisa, the owner, is absolutely fantastic! Very knowledgeable, efficient at answering questions, super nice to exchange with. Lisa is the henna guru without a doubt.
In conclusion: I can, without any hesitation, recommend her henna, and, as an engineer, I’m quite difficult to please but Lisa surprised me with her deep knowledge when it comes to henna dies, tips and tricks.
Below are my grades for a few categories I experienced first-hand with Henna Canada:
Products: A+
Shipping: A+ (even during the postal service strike Lisa managed to get me my order in like 2 days!)
Customer Service: A++